Showing posts with label Party Hearty. Show all posts

Wednesday, September 16, 2009

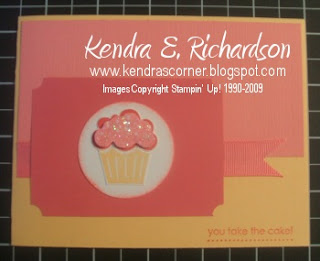
Color Throw Down Challenge Card


Try this color challenge today and you can go to their site to view more cards using this great color combo! The set I used is "Party Hearty".

Monday, August 24, 2009

Mojo Monday Challenge...


OOPS!
I made a mistake...it's not my first, and it won't be my last! But because of it, you will get to see (2) Mojo Ispirations to get your brain going this morning. This is the actual Mojo Monday Sketch above. The one below is the Sunday Mojo Sketch...and I did that one by mistake then when I went to upload it to their gallery, I saw my mistake!
My card uses the Party Hearty Set, Apricot Appeal, Regal Rose, Whisper White, and Rose Red Card Stock. I used Melon Mambo and Apricot Appeal Ink Pads. My Embellishments are; Glitter, Ticket Corner Punch, and 5/8" Regal Rose Ribbon.
You can view more cards using this particular design HERE!


For my Mojo Sunday Challenge Card this week, I used the Upsy Daisy Stamp Set, Whisper White, Sahara Sand, Old Olive, Kraft, & Bordering Blue, & Basic Black Card Stock. Bordering Blue, Sahara Sand, & Black StazOn Ink Pads. My Embellishments are (3) Black Brads and 5/8" Old Olive Grosgrain Ribbon. Technique Used: Direct To Paper - (which means I took my ink pad directly to my cardstock and inked it up).

I hope you feel inspired and want to play along...go HERE if you'd like to view other cards from this challege.

HAPPY STAMPING,
KENDRA

Wednesday, July 8, 2009

Color Throw Down Challenge Card


I used two sets this week to complete my Color Throw Down Card.
1) Crazy For Cupcakes - pg. 68 $23.95 (Balloon)
2) Party Hearty - pg. 69 $26.95 (Sentiment)
I used the Scallop Circle Punch - pg. 186 $15.95
and also the 1" & 3/4" Circle Punches. They can also be found on pg. 186 and both are $10.95. I stamped the balloons on my Whisper White CS, then I stamped them on Real Red, Tempting Turquoise, and Kiwi Kiss. I cut them out and mounted them with adhesive onto the card (I also added some Craft Whisper White Ink with a Blender Pen to give a shadow effect on each of the balloons). I then stamped in Black StazOn the sentiment and punched it out. I punched the other circles and adhered them to each other. Then I sponged around the card in Tempting Turquoise, and added a ribbon in the same color. Lastly I added my sentiment with Dimensionals. I hope you enjoy this idea. Just a side note...you can also stamp your balloons onto DSP and then cut them out. This will give your balloons some pattern/design.
CHECK OUT MORE COLOR THROWN DOWN CARDS HERE!
HAPPY STAMPING,
KENDRA

Monday, March 30, 2009

Switching it up a little!


So this was the Make-N-Take card from my Card & Project group for March.


This is what it looks like when you swing the top up.


So I got to playing this weekend with some leftover pieces and wanted to do some birthday cards. So I made a girl & boy birthday card to share with you all.


This is the inside of it. In all of these cards - you can slip money or a gift card inside the pocket under the greeting.


This is my boy card. I love these colors together; Kraft, Certainly Celery, & Pacific Point. The black and white grosgrain ribbon and black brad complete the look.


Directions:

Cut Kraft CS - 4 1/4" x 5 1/2". Cut the Certainly Celery CS - 3 1/4" x 4 1/4", and the Pacific Point CS - 2 3/4" x 4 1/4". Then stamp Certainly Celery CS as desired. Scallop the top of the Pacific Point Piece. I used the white gel pen to add some detail around the edges. Then Cut a piece of Whisper White CS - 2" x 3" and stamp as desired. Layer that onto a piece of Barely Banana CS - 2 1/4" x 3 1/4". Add some ribbon and your brad to hinge your card together. When you adhere your Certainly Celery CS to your Kraft CS, MAKE SURE to only put adhesive on (3) sides and start 1/2" down on each of the sides to make sure that your Pacific Point CS will layer behind it without getting stuck on adhesive!


HAPPY STAMPING!

Kendra

Friday, October 24, 2008

OCTOBER - Demonstrations from the Card & Project Club and the Scrapbook Club

I loved making this treat for each of my club members. It was so much fun to make and it's a great way to showcase a treat for a special occasion. I got this fun idea from another demonstrators blog. I'm so glad there are talented people out there to share their ideas!


A bookmark with all the In-Colors. Another treat for my club members as a hostess appreciation gift.


This was a project idea I got from my friend Karen. I love how the Word Window punch creates the perfect opening for the chocolate treat.


This was a page I demostrated to both groups. I love this set "Crazy for Cupcakes". I heat embossed the cupcake stand with black powder and then used the aqua painter to color the cupcakes in. I also used dimensionals on the bottom portion of the striped paper, so that it would stand off the page a little and resemble an awning of a bakery store. I love this page!


This was a page I demonstrated to both groups. I used the "Inspired by Nature" set. The technique used was a fun way to get a water colored look by using markers on your stamp - lightest to darkest. Then spritz it lightly with a water bottle (not so it's runny) and then stamp your image.


Make & Take for the Scrapbook Club - we used the "Insired by Nature" set again. I love this set! The cat's tails are accomplished by using the Horizontal Punch. We also used the Hodge Podge Hardware in "Styled White".


Make and Take for the Card & Project Club. I used the small and large oval punch's to create the pumpkins. I also used the 5 petal flower punch to create the leaf and the word window punch for the stem. These pumpkins would be so cute on a place card or napkin ring for Thanksgiving!