Sunday, May 31, 2009

May's Club Demonstrations...


So these boxes were what I made as everyone's gift this month. I also showed how to make them. (Look for the tutorial on Monday). They are cute and perfect for a tiny, but very important gift!


I also demonstrated a very quick, but cute Father's Day Card using the Totally Tool set.


This page I demonstrated at both the Card & Project Club and the Scrapbook Club. It is a darling page for keepsakes. The yellow portion is a pocket. You can put your child's class picture, report card, and anything other keepsake as a reminder for your child for that school year.


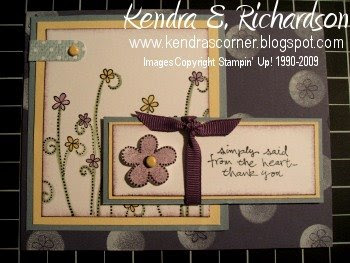
This was the Make-N-Take for the Card & Project Club. We used the Good Friend set.


This was a page I demonstrated at both clubs. The polka dot background is created using a sponge dauber and white craft ink. I used the Petal Pizzazz set and the Mat Pack & Paper Piercer to embellish the corners of my photo mats.


This was the Make-N-Take page for the Scrapbook Club. We used the Bugs & Kisses set which is not in the catalog, but on the dormant list. It made a very cute boy page. For girls you could simply change the colors you use.

Saturday, May 30, 2009

Scrapbook Update...


So just a quick update on my scrapbooking goal. I did make some progress this week and cheated a little! I have been sick again, so some of the pages I made way back yonder, but had never put pictures on them. So I used a couple of pre-made layouts. I did get enough energy to make a few new ones too!


So the page to the left is one I made to show off my daughters HS Graduation announcement and party invite. The page to the right is one I did using some of her photos from her Senior photo shoot with my friend, Summer Driggs. She is an amazing and very talented individual - we just loved her pictures and designs. She also did Jessica's announcements and invites. THANKS SUMMER!


My mom, sister Kari, and two of her children came down from Utah and Idaho for Jessica's graduation. We thought it would be fun to have a "Girls" lunch out. We just had to change the name to "Girls & Logans Lunch Out". Logan, my sister's son, gave me a funny look when I called it a girls lunch. We had fun catching up and it was a great way to get Jessica to relax a little. We took her to her favorite place - Mimi's Cafe!


This page features photos from her Grad Night. The HS puts on a grad night for all seniors following the graduation ceremony. They treat the kids to a sit down dinner, and lots of enterainment like; casino games, a hypnotist, a magician, making their own music videos, beading necklaces, getting manicures and their hair done, airbrushed tattoos, lots of snacks, jumping castles and fun games all night long.


This page features some pictures from her senior year with friends.


This page is done with just one picture and was designed to be like a bakery store front.


A page with friends pictures for her to reflect back on. Jessica just picked up some more photos for me and I have so many more pictures I need to scrap book now. I'm on a roll now. I reached my goal of 10 pages this month actually getting scrapbooked! If I had been feeling well, I would have done more, but I'm happy I reached my goal. I hope if you set a goal this month, that you too accomplished it and had fun scrapbooking those memories for your family!

HAPPY STAMPING & SCRAPBOOKING! KENDRA


Friday, May 29, 2009

Friday's "Stamp Set Spotlight"...


Totally Tool
#113256
Price: $25.95
Here’s to you—all you handy men and women! Our Totally Tool set makes it easy for you to cheer on all the skilled people who help fix up your life with a totally cool handmade project.
Set Quantity: 5

CS - Old Olive,Pacific Point,Summer Sun,Whisper White, DSP- Good Morning Sunshine, INKS - Sahara Sand,Close To Cocoa,Pacific Point, EXTRAS - Dimensionals, 1/2" Circle Punch, Antique Brads.


CS - Bordering Blue, Not Quite Navy, Whisper White DSP - Urban Garden INKS - Close To Cocoa, Not Quite Navy EXTRAS - Aqua Painter, Antique Brads, Dimensionals, Ticket Corner Punch


CS - Whisper White, Bashful Blue, Barely Banana INKS - Black StazOn, Really Red DSP - Washington Apple EXTRAS - Scallop Edge Punch (used both sides of 1" strip of cs, but off set a little to create Rick Rack) Antique Brads, Dimensionals, Sponges.


Thursday, May 28, 2009

Scrapbook Basics!

National Scrapbooking Month is almost over, have you been inspired to start scrapbooking? Ali Edwards is one of the big names in the scrapbook community, she is a regular contributor to Creating Keepsakes Magazine, she posted these tips on her blog :
20 Scrapbooking Tips
1. Get over what you "think" it should be and just allow it to be ("it" will be something different for every person).
2. Examine how you look through the lens of your camera . What do you really see? What are you looking for? Next time you pick up your camera let yourself play a bit more by looking up, down, to the sides, etc. of your subject. There are so many interesting things out there in the world. I am particularly interested in the ways things meet together - people, places, things.
3. White cardstock is always a solid choice for the foundation of your layout. I love it. It is my go-to color of choice.
4. Mix up your page sizes. For the last year I have been experimenting with all sorts of different sizes - this is a huge creative boost. Online lately I have seen really cool pages that are 6 inches x 12 inches, 4 inches x 12 inches, 8 inches x 8 inches, etc. Don't limit yourself to one size.
5. Keep an inspiration journal. This is the one of the best things you can do for your creative self. Don't judge what you write in it or put in it - just use it and abuse it and let it be a place for the things that are scrambling in your head. For a long time I have had too many of these and it began to feel way to scattered. Recently I have combined it into one notebook - forcing myself to use just one and go with it.
6. Repetition. Probably my favorite design principle: do something once and then do it two more times. Three is a very nice number. Repeat colors. Repeat shapes. Repeat accents.
7. Expand yourself. Find something else to learn about next: a new interest, a new subject. Learning stuff fills you up, gives you more to draw from when you sit down to create.
8. Note to self: there is no perfect layout. Forget about perfection; rather adopt an attitude that you will learn something from each layout you complete. Maybe it will be a new way to combine colors, create embellishments, or crop your photos. Maybe it will be that you totally dislike the way you did something. Make a mental note and move on to the next thing.
9. Alphabet stamps in classic typefaces are great for the long haul. Here's a couple favorites: Hero Arts Printer's Type or Basic Upper Case.
10. Layer. When you are putting a layout together think in terms of layers: cardstock, patterned paper, transparency, stickers, stamps - what can you add on top of the last layer to make the piece more interesting?
11. Learn how to be self-critical without putting yourself down. How do you do this? As you create stuff ask yourself "does this really need this accent? Am I adding to the overall story or am I adding it just to add it?" There's no right answer - it's more about developing a general awareness and connection with yourself as you are creating. Be ok with stopping yourself and moving on to the next piece.
12. Just stick it down. If you have been looking at a single layout for days and days and days it is probably time to just stick it all down and move on the next. Isn't it awesome that there is always another story to tell?
13. You can never go wrong with circle or square punches.
14. Collect stuff (and not just scrapbook supplies). Mail pieces. Tags. Bits of stuff. Cut it up. Grab a manila folder or a basket or a box (don't make it complicated) and stick stuff in there. Regularly dip back into that spot for ideas and inspiration.
15. Read more about the Art of Finding.
16. Make sure you are in your scrapbooks. Take photos of yourself. Set your timer. Hand over your camera. Get together with friends to take photos of one another. Your kids and your family will thank you.
17. Bring your scrapbook talents into your home environment (also known as living with your art). Create collages to hang in your home. Enlarge and frame your favorite photos or layout. Create cool accents for your mantle with your supplies. There is so much that can be done with all those supplies you have collected to bring your hobby into the living areas in your home.
18. Take some time to go back over all the layouts you have created and give yourself a hug for all the stories you have told. Taking a look at the body of your work will give you a whole new perspective on what you have done and where you want to go next.
19. Create less. Rather than doing a bunch of layouts just for the sake of filling up an album, spend more time on just a few stories that really have meaning for you and your family.
20. Go make something right now. Stop whining. Stop coming up with excuses. Start now!
Thanks to Scrap101 Coordinator, Angi, for this article.
HAPPY STAMPING & SCRAPPING,
KENDRA

Wednesday, May 27, 2009

Color Throw Down Challenge Card


This weeks challenge uses Bordering Blue, Elegant Eggplant , & Barely Banana.
I used the following supplies;
Bordering Blue CS #102630 $5.50
Elegant Eggplant CS #105126 $5.50
Elegant Eggplant Ink Pad #105210 $5.95
Barely Banana CS #102701 $5.50
Barely Banana Ink Pad #101170 $5.95
Whisper White CS #100730 $7.50
Craft White Ink Pad #101731 $7.50
Always Artichoke Ink Pad #105219 $5.95
Black StazOn Pad #101406 $7.95
Dimesionals #104430 $3.95
1/4" Elegant Eggplant Ribbon #109039
Blender Pen #102845 $9.95 (3)
Sponge Dauber #102892 $10.95 (12)
Brads: Soft Subtle #106954 $8.95
Word Window Punch #105090 $15.95
MAKE SURE TO CHECK OUT OTHER SAMPLES USING THIS COLOR COMBINATION...HERE!
HAPPY STAMPING,
KENDRA

Tuesday's Tool or Technique...


Two-Step Stampin'® & Repetition


Technique A: Two-Step Stampin'
1] Stamp the base image.
2] Position and stamp the overlay or adjoining image.


Technique B: Repetition (Stamping Off)
1] Ink a stamp.
2] Stamp the image.
3] Restamp the image one or more times without re-inking it. This technique is a great way to get several shades of color from a single ink pad.
QUICK TIP - Use lighter ink for the base image and darker ink for the overlying image.

So sorry I'm a day late with this post, we've been experiencing some computer problems!

HAPPY STAMPING,
KENDRA

Saturday, May 23, 2009

BLOG CANDY WINNER!

AND THE WINNER IS...

Cindy Ferenz. Cindy is from Fredericksburg, Virginia. Here is a little about her: I am the wife of a wonderful man (31 years)and mother of two fantastic boys, George, 25 and Jacob, 18. I have 3 spoiled rotten cats: Angel, Tigger and Li'l Bit. I love to stamp and scrapbook whenever I can and I collect dragons, fairies, wizards and dragonflies. I am also in 3 different Red Hat groups and have a blast! Life is good!!!


So Cindy...contact me at skjj4richardson@msn.com with your address and I'll mail all your goodies out to you!


Thanks to everyone who participated in the Blog Candy Give Away. I hope you will come back often and participate in the next give away!

HAPPY STAMPING,
KENDRA

Scrapbook Update...

So this is what I got accomplished this week! Hardly anything...I'm starting to stress a little about my goal for this month. Although, now that Jessica's Graduation is over & all of my family visiting from out of town has left, I will have more time on my hands to play & scrapbook those pages.

For Grad Night 2009 - the committee asked every parent to make a horizontal 8 1/2 x 11 collage of their graduate & lamenate it. I played with some pictures, scanned, edited & printed them out. Then decided on a layout design. I wanted to try and get as many pictures on there showing her through out the years. We were then asked to drop them off in the school's front office. On Grad Night (right after graduation) the Seniors were served a sit down dinner before being locked up inside Grad Night (they entertain the kids all night with different activities like casino games, spa treatments, rides, etc. until 5 am), and as they entered they all walked through a Hall of "Memory Lane" where these were all hung. This is just another idea how you can use your pictures to scrapbook.

HAPPY STAMPING & SCRAPPING,
KENDRA

Friday, May 22, 2009

Friday's Stamp Set Spotlight

LOADS OF LOVE -
pg. 43 - Set of (7) $23.95


Here are a ouple of samples using the Loads of Love Set. You can also check out the links below for some other great ideas using this set.


Sara-Jane

Teneal Williams

Ruth Hinds

Thursday, May 21, 2009

Thursday's Scrapbook Basics!

Whether you just started scrapbooking, are a seasoned pro or just considering the hobby, sometimes, we all need a little mojo, a few ideas to get us started.There are many different ways to organize your scrapbooks. You can create themed scrapbooks, chronological scrapbooks or event scrapbooks.I use all three organizational methods in my scrapbooking. For example, my children each have a baby book, a sports scrapbook and a school years scrapbook. These are examples of themed albums, the entire album is related to s single theme, perhaps over several years. We have a Christmas album and an album which documents Halloween costumes through the years. I even have an event scrapbook which catalogs all of the roller coasters I have ever been on (using ad photos from the internet or brochures). When you get addicted to scrapbooking, you will scrap almost anything, trust me!I use chronological scrapbooking to make a single-family album for each year. All the non-Holiday events go in this scrapbook, birthdays, trips to the park, amusement parks etc. There is no rhythm to these books other than they are in order of the way they happened and sometimes, just the order I scrapbooked them. There is no need to start from the beginning, start with today and when you have time and feel the mojo, or remember a story you want to tell, go back and add the pictures and stories from the past.Event albums are similar to themed albums. I call it an event album when Its not likely to be repeated. For example an Album from a two-week vacation, what we did, where we went, who we were with, etc. It's not likely I will repeat these albums, another similar event will likely lead to another, individual scrapbook.So, start looking through your pictures and get an idea for what story you want to tell.If looking through your pictures doesn't help you get started, think about why you want to scrapbook. Do you want to scrap to remember? Do you want to tell a story? Are you creating a gift book for someone? How about a calendar, with a picture of your child during each season..Some really simple things to start with: Baby's first yearSchool Years SportsVacations Holidays Traditions Friends Concerts you attended Tribute album to your favorite relative.What story do you want to tell? Who do you want to tell it to? If you still cant find a picture to stir up inspiration, start by telling the story. Try journaling on 3x5 index cards and find a photo to go with the story later. The important thing to remember is there are no rules or deadlines.I hope this article starts your creative juices flowing!
Thanks to Angi Anderson, SUDSOL Scrap101 Coordinator!

Wednesday, May 20, 2009

Color Throw Down Challenge Card


So for this weeks Color Throw Down Challenge Card - it's "simple is best". Or in this case...quick! My mom, sister & her children arrived last night for my daughter, Jessica's, graduation. Yes, I am old enough to have a child graduate from high school! But only just barely. We are excited for tonight and her future at the University of Arizona.
So long story short...I promised my family a big homecooked breakfast, so my card this morning had to be quick, lot's of preparation for the party and festivities tonight.
I used the Petal Pizzazz Set. Page 90 - $32.95 (7). I also used the Doodle Wheel, 5/8" Grosgrain ribbon, dimensionals, fine cosmo glitter, and the spritzer tool.
For more ideas with this color theme - check it out HERE!

Tuesday, May 19, 2009

Tuesday's Tool or Technique...


Dry Embossing

1] Secure the Classy Brass template to a light source, such as a light table or a window, with a piece of tape.
2] Rub waxed paper on the surface of the card stock so that the stylus will glide more smoothly and to help prevent tears in your paper.
3] Place the paper or card stock over the template, positioning it so that you'll have the image where you want it. For a raised image on the front of the card, place the paper face down.
4] Using the large end of the stylus tool, press the paper through the open areas of the templates. This produces a raised image.
5] If you want to color the raised image, reposition the brass template over the image on the front side of the card stock. It will act as a mask to protect the flat surfaces around the embossed image. Apply color with a small sponge using Stampin' Pads or Stampin' Pastels.
QUICK TIP - Make sure to use the small end of the stylus to emboss small areas or patterns of the design.

Monday, May 18, 2009

BLOG CANDY GIVE AWAY!

Are you back for some Blog Candy???
I hope you all had as much fun as I did going through the Blog Tours this weekend. I really got inspired from some talented stampers. If you are returning, welcome! I'm glad you joined us for this FREE give away. Okay...this is what you need to do. Leave me a comment on this post and tell me (2) things.
1) What did you like most about the Blog Tour?
2) What things/items inspire you most when you look at blogs?
If you do that your name will be entered into the drawing for the Blog Candy give away! You can post now through Friday night, and a winner will be chosen & announced Saturday.
GOOD LUCK & HAPPY STAMPING,
KENDRA

Sunday, May 17, 2009


The BLOG TOUR is now over. The links have been removed. I hope you all had a chance to view all the wonderful projects! If you liked the BLOG TOUR, there's another starting on July 27th thru the 28th. It will coincide with the release of the new Stampin' Up! Catalog. So be sure to stop back by here to take a look ! Thanks everyone for your wonderful comments and for taking the time to stop by.
HAPPY STAMPING,
KENDRA

Thursday, May 14, 2009

BLOG TOUR - MAY 15th & 16th

Welcome!
Tour #6 - Stop 8
Featured Set: Good Friend
Welcome to my blog! My name is Kendra Richardson & I LOVE to
stamp and scrapbook. I post regularly every week...so come on back anytime.I hope you enjoy the projects I've made using the Good Friend Set.

Just click on any of the pictures to enlarge them!


This set uses our Carousel Notes that come with Chocolate Chip Envelopes. I love the ribbons from our Ribbon Origionals! They are so vibrant and add the perfect embellishment. Another new favorite of mine are our Corduroy Buttons...LOVE THEM!


This 3x3 card uses our Textured Cardstock - in Chocolate Chip, and Baja Breeze Cardstock. I also used the mat pack and paper piercer for a nice detail. Other embellishments include; slot punch and Pumpkin Pie Ribbon, Earth Element Brad and 3/4" circle punch.


I made a small box using Cardstock and Designer Paper in Good Morning Sunshine, which coordinates so beautifully with this set. I then made (8) tags that go into the box for the perfect gift! (2 are in the box!)


This is a 6x6 scrapbook page. I used Pacific Point, Kiwi Kiss, Whisper White, Basic Black, and Bordering Blue Cardstock. The bird is stamped upside down on paper and cut out to create a whale. Use the flower for the spout. I also used a rhinestone for his eye. This is a great way to highlight a trip to Sea World!


I used Summer Sun, Chocolate Chip & Whisper White Cardstock. Don't you just LOVE these new Flower Brads we carry! They add so much to a card or page. I also used DSP in Good Morning Sunshine, the Scalloped Edge Punch, and Chocolate Chip Ribbon. This idea came from my own blog hopping, I just wish I could remember the talented stamper I cased this from!


This card uses Pretty in Pink, Certaily Celery and Whisper White Cardstock. I used Dimensionals to pop the the flowers off the card, and Pretty In Pink Ribbon. This gives you a new way of looking at this set using softer colors.


And finally, this card is a 6x6 card. It uses the DSP-Good Morning Sunshine and our On Board So Tweet, which I covered the body, wing, and tail in DSP. The beak and feet, I used a sponge and Pumpkin Pie Ink. I stamped directly onto the DSP and used a rhinestone for my birdie's eye.


Thanks for stopping by!

Don't forget to bookmark my blog, because the links will disappear at midnight on Saturday, May 16th.
Also...you'll want to come back Monday, May 18th for a BLOG CANDY GIVEAWAY that you won't want to miss!
I hope that you were inspired! Please leave me a comment below and let me know what you thought!

Now, let me introduce you to my colleague, Kelly Mayou, who will be featuring "Thoughts & Prayers" from the Spring/Summer Stampin' Up! Idea Book & Catalog.

Just click on the icon below to get back on the tour bus and travel to the next stop!
HAPPY STAMPING,
KENDRA

Thursday's Scrapbook Basics!

New to scrapbooking? Let's look at the basic elements of a scrapbook layouts.There are no rules in scrapbooking, however, you will notice several standard elements on most pages.I recommend you start with these standard elements and later you can add or take away from your layouts as you become more comfortable with your own style of scrapbooking.
Standard Elements:
1) Page Title - A title doesn't have to be at the top of the layout. It can be placed anywhere. Usually the viewer's eyes will scan the layout for the title when looking at a layout, this will give them a quick idea of what they are looking at, as with a well written article, the title is what grabs the viewers attention. Use your title to highlight, summarize or suggest the page theme, simple titles are usually best. You can use sayings, quotes, phrases or something else that will grab the attention of your reader. The title can be made with stickers, paint, handwritten, computer generated, stenciled and of course, STAMPED.
2) Pictures - many people think of this aspect when thinking of scrapbooks. While most layouts do contain one or more photos, I like to think of each scrapbook page as telling a story. Ask yourself, Do I need a photo to tell this story? Do I have a photo to tell this story? Can I use a program, advertisement, label, journaling or anything else to tell the story without a photo?
3) Journaling- For me, this is the most important part of the layout. Thinking again of your story, a picture may be worth a thousand words, but, what words do you want your reader, or viewer to think of when they look at your layout? While a short description of your photo will do, I like to tell the story behind my photo. For example, I might have an adorable picture of my son on a layout, would I rather the reader (In this case, probably my kids, grandkids, etc) to know that it was Sunday and we were at the zoo, or do I want my readers to know that I loved my son more than anything and this particular picture is what I remember most about his 2 year old personality. If you find it difficult finding what to say at first, think or a phrase, poem, saying, song lyrics that will describe what you are feeling. Again, the point is the story behind the photo, not necessarily always the photo itself. I mean how many times can you journal about the kids playing in the backyard? You can however, use one of those 200 pictures you took of the kids in the yard last weekend, to journal about the funny thing your tween said, the thing you want to remember and know you will forget if you don't write it down. Journaling can be done on the photo, on a stamped journaling block, a sticker, a card, right on your background paper or even hidden from view.
4) Page Accent (AKA embellishment) - This includes stickers, flowers, slide mounts, buttons, ribbons, chipboard, brads, eyelets, receipts, etc. Anything that is used to dress up your page. Every scrapbooker has their own style, some like a lot of embellishments and some like a page-full. I prefer embellishments that add to my layout, without overwhelming or drawing away from the photos and journaling. Sometimes I use a cute little embellie to take up some negative space on my layout. You will learn, with practice, what your style or preference is.
5) Mat- Simply said, this is the layer of paper under the photo, which leaves an all-around border that helps your photo stand out. A mat can be made of cardstock, patterned paper, acrylic paint and other decorative elements. A mat can also be thin, thick, dimensional, flat, plain or elaborate depending on the effect you want to create.You don't have to mat all the photos. You can just mat your focal-point photo, you can also choose to mat all the photos and then double or triple-mat the focal-point photo for extra attention.That's It! These are 5, very simple standard elements of scrapbooking. Again, there are no rules, these are simply meant to give beginners a starting point from which they can develop there personal style. To get your beginning scrapbooker started, all they need is some cardstock, DSP, scissors, next, of course add a good letter stamp to use for titles and some versatile phrase stamps to help them with journaling. Next, add some buttons and ribbons as embellishment. Or, A simply scrappin kit has everything a beginner needs, if they arent quite ready to start matching their own colors and designing their own pages.
These ideas came from SUDSOLS newest Scrap101 Coordinator, Angi Anderson - Thanks Angi!

Wednesday, May 13, 2009

Color Throw Down Challenge Card


For this weeks challenge I used the set "Wild About You."
It can be found on page 73 in the current SU!Spring/Summer Catalog. It is a set of (8) $25.95.
This is a really cute set to use for zoo scrapbook pages and childrens birthday cards!
Tempting Turquoise, Basic Black, So Saffron, and Whisper White CS. I used markers in: So Saffron, Pumpkin Pie, Temting Turquoise, and Garden Green. I used my Sahara Sand and Pink Pirouette Ink Pads.
To Embellish my card, I used some Linen Thread & (2) Bold Bright Brads.
HAPPY STAMPING,
KENDRA


You can view more cards made for this Color Throw Down Challenge HERE.

Tuesday, May 12, 2009

Tuesday's Tool or Technique...


MASKING TECHNIQUE

1] Stamp image on card stock.
2] Stamp it again on a piece of scratch paper.
3] Cut carefully around the scratch paper image, cutting just inside the lines; this will be your mask.
4] Place the mask on top of the card stock image.
5] Stamp another image over a portion of the mask to create layered, interacting images.
6] Remove the mask to see the finished look.
7] To stamp a partial image, use tape to cover the part of the stamp you don't want to appear, ink the stamp, remove the tape, and stamp the image.
QUICK TIP To ensure that the mask stays in place, stamp image on a Post-It® note.


Here's a card using the masking technique to inspire you. I hope you have fun trying it and adding a new technique to your bag of stamping tricks.
HAPPY STAMPING,
KENDRA


Monday, May 11, 2009

Monday's Share/Sneak Peak...


I just wanted to share a sneak peek with you of some of the items I'll be sharing with you on Friday for the Blog Tour. The tour and our regularly scheduled Friday Stamp Set Spotlight Post will be all together on Friday. The set I'm using for the Blog Tour is: Good Friends, and it will also be our Spotlight Set this week. So make sure to come back here sometime this Friday, May 15th or Saturday, May 16th to jump on the tour. Start with my blog and travel on to others who will share some great ideas with you! I'm really excited to share what I came up with for this set...so hopefully I'll see you back here on Friday!
Happy Stamping,
Kendra