Saturday, July 31, 2010

Saturday Sketch & Inspiration Challenge...


Hi everyone! I hope your weekend is off to a great start. Today I have a scrapbook page layout for you to try. You can even incorporate (smaller scale) into a card if you wish. Use the sketch and the picture to inspire your creativity. Above is what I came up with - hope you enjoy and that it sparks some of your creative juice...now go create!

Friday, July 30, 2010

Friday's Spotlight...

Have you ever wondered what being a Stampin' Up! Demonstrator would be like? Well I have some photos from this years SU! Convention to share with you for our Friday Spotlight. I LOVE what I do and I LOVE sharing it with others. Paper crafting for me is a wonderful outlet and hobby that I have enjoyed for years. Each year SU! Demonstrators have the opportunity to attend Convention. Here are a few pictures to inspire you...and if you'd like more information on becoming a demonstrator so you can attend convention next year - contact me @ skjj4richardson@msn.com or (520) 744-2537


Thursday, July 29, 2010

My Digital Studio Project Share...

CHRISTMAS IN JULY!
Did you know that with MDS you can create your very own Christmas Photo Cards. It's not to early to be thinking about that and it will save you time during the busy holiday season so you can enjoy more time with your family & friends. Simply create what you want in the MY DIGITAL STUDIO program and send the JPEG to a printing place. Make sure to allow for turn around time. When I sent mine to a BIG BOX STORE to be printed, I got (4) to a sheet and simply cut them with a paper trimmer when I got home - they also included the envelopes for a terrific price. SU! also has a terrific printing price point and the quality is super.
Make sure to check out this video HERE to learn more about the MDS Program. It doesn't take a rocket scientist to figure out. It was so easy...I was creating the day I received mine!


Wednesday, July 28, 2010

Wednesday's Card or Scrapbook Page Share...

So as promised yesterday in my Tutorial...here are the pictures of the scrapbook page that I incorporated my Scallop Circle Punched Flower on. There are a few close ups so that you can see the journaling slip, paper folding, and the flower itself. I hope your week is going well!


Tuesday, July 27, 2010

Tuesday's Technique, Tool, or Tutorial...

Today I'm going to show you how to make a cute "Scalloped Circle Punch Flower". You will need the 1 3/4" & the 2 3/8" Scallop Circle Punches.


So let's begin!


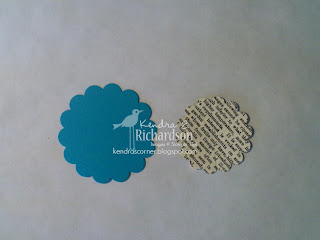
You will need to punch (2) of each of the sizes. This picture only shows (1) of each...but you need to have two of each to complete the flower. The paper I am using is: NEWSPRINT DSP

Next take all (4) Scalloped Circle pieces and with your scoring blade, score in between each of the scallops to create this look above.

Next, take your Paper Snips and snip in on one of the lines just to the middle. Then fan fold your pieces. REMEMBER: to complete the flower you will need (2) of each of these shown in the picture.
NOT SHOWN: next take your two largest scallops and glue the edges together and set aside. Do the same with the smaller scallop circles and set aside to dry.


After they have had drying time...put a brad (I used a large rhinestone brad) into the center. There will be a hole in the center of both your scallops when you finish gluing them.


Here I have given you a sneek peak at how I used it on a scrapbook page.
Make sure to check back here tomorrow to see the full page!


I also wanted to share how instead of putting these cute flowers on pages...they can be put on a clothes pin. These are darling when you fill a simple brown lunch sack with cookies or treats. Fold down the top of the bag and use the clothes pin to keep the bag shut.
ADDED BONUS: Put a small magnet on the back of the clothes pin and then it can be used on a magnet board or refridgerator!


Monday, July 26, 2010

A WARM WELCOME!

A big warm welcome to Gretchen Knutson and Christy Stevenson (Chita), who have joined the Stampin' Up! Family and the "You've Got Stamp's" team. Gretchen is a returning demonstrator and Chita is brand new, but has been paper crafting for years.
I'm so glad to have you ladies along on this wonderful journey!
As you can see from the picture above you could say your joining a wild & crazy group!
We have great fun as demonstrators as you can see. This picture was taken this past week at convention during a flower power/wild child get together at the yearly SU! CONVENTION in Salt Lake City, Utah. In the center is CEO & Co-Founder Shelli Gardner, and her husband Sterling surrounded by a few demonstrators! Just another great benefit you can look forward to being a SU! Demonstrator.
WELCOME - WELCOME - WELCOME!

Monday's Big Shot Project Idea...

I have a card that uses one of my newest favorite BIG SHOT toys...the Clearlits Scallop Rectangle Die. I have had so much fun using this die to create great cards with. This card idea comes straight from the Stampin' Success magazine that SU! Demonstrators get every month full of ideas.
If you'd like to learn more about this BIG SHOT DIE or place an order - click HERE!


Sunday, July 25, 2010

Sunday Share...

FINAL WEEK!
CALLING ALL FORMER DEMONSTRATORS...
Now's the time to rejoin the Stampin' Up! Family for ONLY $35.00.
Click on the picture above to take you to more information and please give me a call if you have any questions. I'd LOVE for you to join my "You've Got Stamps..." team!
You contact me @ skjj4richardson@msn.com or (520) 744-2537. You do not need to live here in Tucson to become a member of my team. I have team members that live outside of Arizona:)
You will still have all the benefits; monthly newsletter, monthly challenge, meeting notes, access to team blog, card swaps each month, and so much more!
*All paper work must be into SU! by July 31st - No online sign up's for returning demonstrators.

Saturday, July 24, 2010

Saturday Sketch & Inspiration Challenge...


Above you'll find my completed card using this sketch and picture as inspiration. When you get a chance toplay...see what you can come up with!


Friday, July 23, 2010

Friday's Spotlight...

Today's SPOTLIGHT is on a set that I have really been having some fun with lately. I have to admit that I bought this set and then it sat on my shelf for about a month in a half before I got the chance to play with it. I knew it was set I would enjoy using...but I REALLY LOVE THIS SET! I know you have seen a couple of these projects from earlier posts, but just in case you missed them here they are again with a couple of new ones for you.

Happy Together
#114314
$14.95
The flock of birds in the Happy Together stamp set make a darling decoration for any friendship, springtime, or anniversary card.
IF YOU'D LIKE TO ORDER THIS SET or ANY OTHER PRODUCTS...JUST CLICK HERE!

Thursday, July 22, 2010

My Digital Studio Project Share...

Hi There!
I hope your week is going well so far for you. I have a page and a card to share with you today. Both are created from scratch - but did not take long at all. It is fun to be able to personalize cards to a nephews likes. I also have enjoyed the fact that with MDS you can use ANY FONT that is on your computer...it makes it really nice to have a variety to choose from and play with. Plus there are FREE font sites out there that you can get just about any type you want. If your looking for some really cute and fun fonts - make sure to check out Kevin & Amanda @ Fonts For Peas by going HERE!


Wednesday, July 21, 2010

Wednesday's Card or Scrapbook Page Share...

Even Demonstrators Make Mistakes...
Below you can see in the first picture that when I went to stamp my greeting (circled in red) that I was not straight. How many times have you done this??? You get to the very last step on your card that you spent time on and you make a darn mistake. Well...I'm right there with the best of you! I too am prone to making mistakes and wanted to share my "FIX" with you today. In the second picture you can see what I did to resolve my problem. I simply stamped my greeting on another piece of Card Stock and cut it out, sponged around the edges, pierced a hole, and added some Linen Thread through it. I used Dimensionals to pop it up over my mistake...for a quick fix that I think made the card even cuter! The third picture shows you the card from my friend Sue Brown that I based my card off of.
HAPPY CREATING - Kendra